杰网资源 Design By www.escxy.com
利用PS可以打造出各种各样奇特的文字效果,下面我们来制作一款压纹镂空文字……
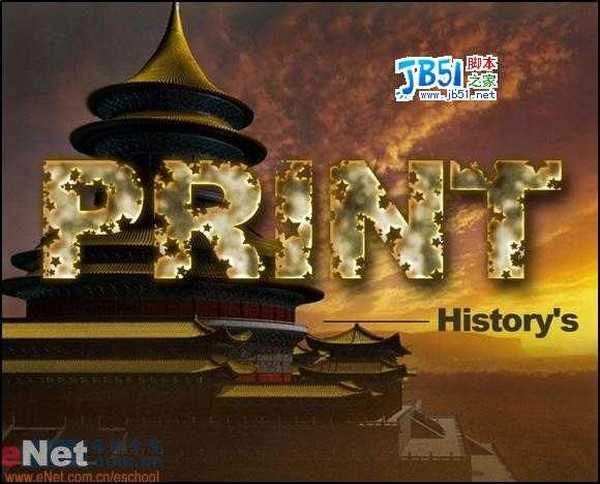
先看一下效果:
制作工具:Photoshop CS
制作过程:
1、新建一个宽度为100像素,高度为100像素,分辨率为350像素的文件。
2、新建图层1,单击工具箱中的“自定义形状工具”,在其属性栏中单击路径按钮,并在形状下拉面板中选择五角星图案,然后在窗口中拖拽创建一个五角星路径,如图01所示。

3、按Ctrl+Enter键,将路径转换为选区,对选区填充黑色,取消选区,效果如图02所示。接着对图层1执行菜单栏中的“编辑”“定义画笔预设”命令,在弹出的对话框中单击确定。

4、新建一个文件,设置前景色为黑色,然后单击工具箱中的“文字工具”,在图像窗口中输入文字,效果如图03所示。

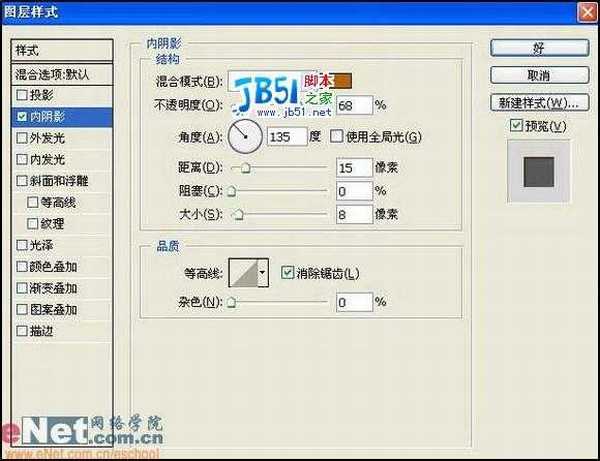
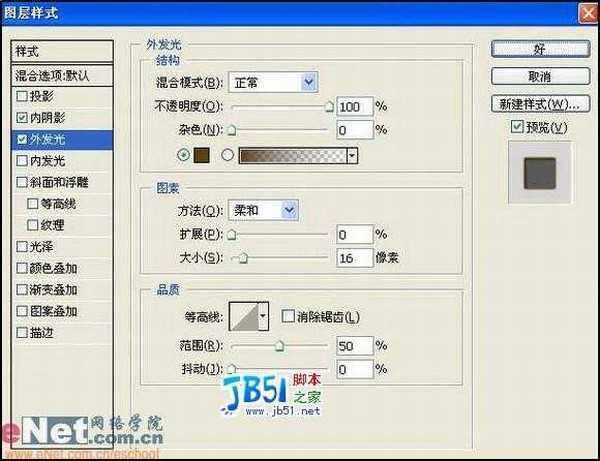
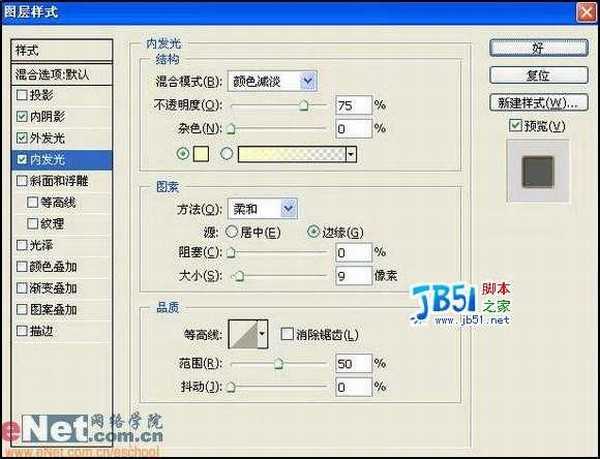
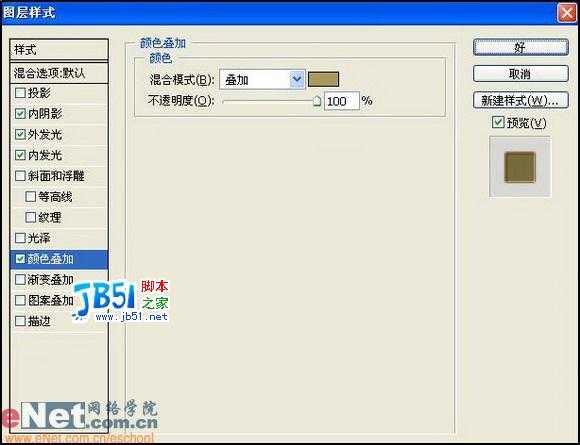
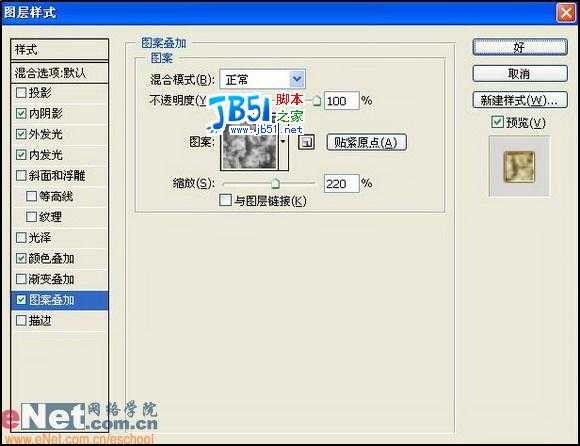
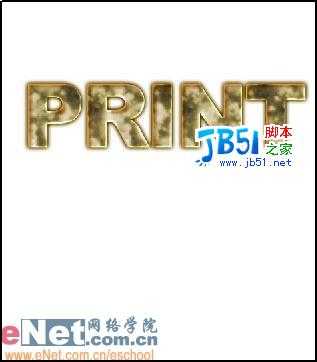
5、在文字图层上单击右键,在弹出的快捷菜单中选择“栅格化文字”命令,将文字层转换为普通层。双击文字层,弹出图层样式对话框,在对话框中选择内阴影、外发光、内发光、颜色叠加、图案叠加样式,设置参数如图04-08所示,设置后的效果如图09所示。
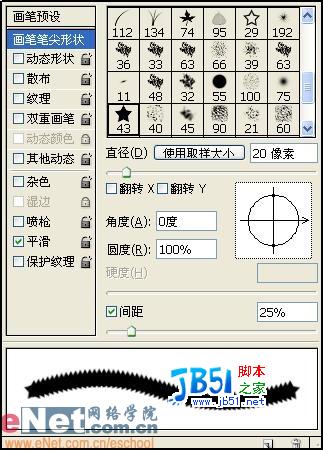
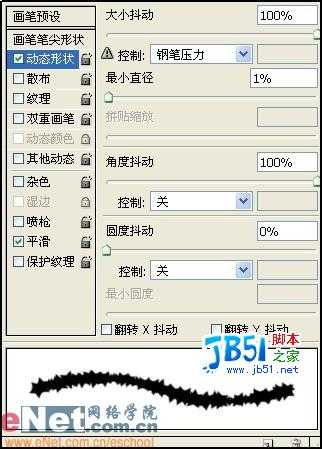
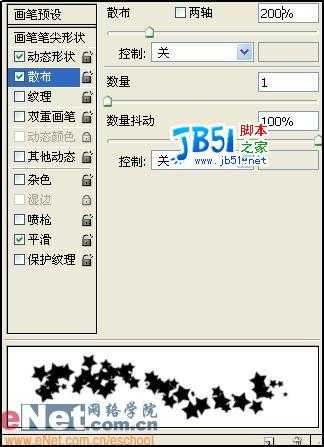
 6、单击工具箱中的“橡皮擦工具”,在属性栏的右边单击“画笔”标签,选择前面定义好的笔刷形状,并设置画笔的动态形状,如图10-12所示。
7、选择文字层,在文字上单击,可随机擦掉图像,通过按【和】键调整画笔的大小,文字效果如图13所示。

8、新建图层,使用文字工具为图像添加其他的文字,效果如图14所示。

9、为文字选择合适的背景,最终效果如图15所示。
先看一下效果:
制作过程:
1、新建一个宽度为100像素,高度为100像素,分辨率为350像素的文件。
2、新建图层1,单击工具箱中的“自定义形状工具”,在其属性栏中单击路径按钮,并在形状下拉面板中选择五角星图案,然后在窗口中拖拽创建一个五角星路径,如图01所示。
3、按Ctrl+Enter键,将路径转换为选区,对选区填充黑色,取消选区,效果如图02所示。接着对图层1执行菜单栏中的“编辑”“定义画笔预设”命令,在弹出的对话框中单击确定。
6、单击工具箱中的“橡皮擦工具”,在属性栏的右边单击“画笔”标签,选择前面定义好的笔刷形状,并设置画笔的动态形状,如图10-12所示。 杰网资源 Design By www.escxy.com
广告合作:本站广告合作请联系QQ:858582 申请时备注:广告合作(否则不回)
免责声明:本站文章均来自网站采集或用户投稿,网站不提供任何软件下载或自行开发的软件! 如有用户或公司发现本站内容信息存在侵权行为,请邮件告知! 858582#qq.com
免责声明:本站文章均来自网站采集或用户投稿,网站不提供任何软件下载或自行开发的软件! 如有用户或公司发现本站内容信息存在侵权行为,请邮件告知! 858582#qq.com
杰网资源 Design By www.escxy.com
暂无评论...


RTX 5090要首发 性能要翻倍!三星展示GDDR7显存
三星在GTC上展示了专为下一代游戏GPU设计的GDDR7内存。
首次推出的GDDR7内存模块密度为16GB,每个模块容量为2GB。其速度预设为32 Gbps(PAM3),但也可以降至28 Gbps,以提高产量和初始阶段的整体性能和成本效益。
据三星表示,GDDR7内存的能效将提高20%,同时工作电压仅为1.1V,低于标准的1.2V。通过采用更新的封装材料和优化的电路设计,使得在高速运行时的发热量降低,GDDR7的热阻比GDDR6降低了70%。